NBI Login 2026: How to Sign In, Register, and Access Your Account
Almost everything you do with NBI online happens inside one account: booking your appointment, paying, tracking your transaction, and renewing. Getting into that account is where many people get stuck. NBI has two application portals that show up when you search for an NBI login.
This guide shows you which page to open, how to sign in, how to register if you haven’t yet, and what to do when the login won’t work.
NBI Login: Which Portal Should You Use?
NBI runs two application portals, and the right one depends on why you’re applying. Picking the wrong one is the fastest way to lose time or to pay for a clearance you could have received for free.
NBI Login Clearance Portal for Regular Applicants
Access the main portal (clearance.nbi.gov.ph). Use it if you’re applying for a clearance, booking an appointment, or renewing, and you’re not claiming the first-time jobseeker exemption. Your account here holds your applicant information, your clearance applications, your appointments, and your payment records.
First-Time Job Seekers Portal for Free NBI Clearance
If you’re claiming the free clearance under RA 11261, you use a different portal: (firsttimejobseekers.nbi.gov.ph).
NBI’s own how-to-apply page tells first time jobseekers to use it instead of the regular one. It has its own sign-up and sign-in, so create your account there from the beginning. The documents you’ll need for the free clearance are a separate topic, covered in the first-time jobseeker guide.
How to Make Sure You Are Using the Correct NBI Website
If you’ve been typing “www nbi clearance gov ph login” or “nbi gov ph online login” into a search bar, check where you land before you type anything. A few habits keep you safe:
Lookalike sites are a known problem. They can charge extra fees or collect your personal details. Nobody legitimate needs your password, so if a site or a “helper” asks for it, close the tab.
How to Log In to the NBI Clearance Portal
This section assumes you already have an account. If you don’t, jump to the registration section first.
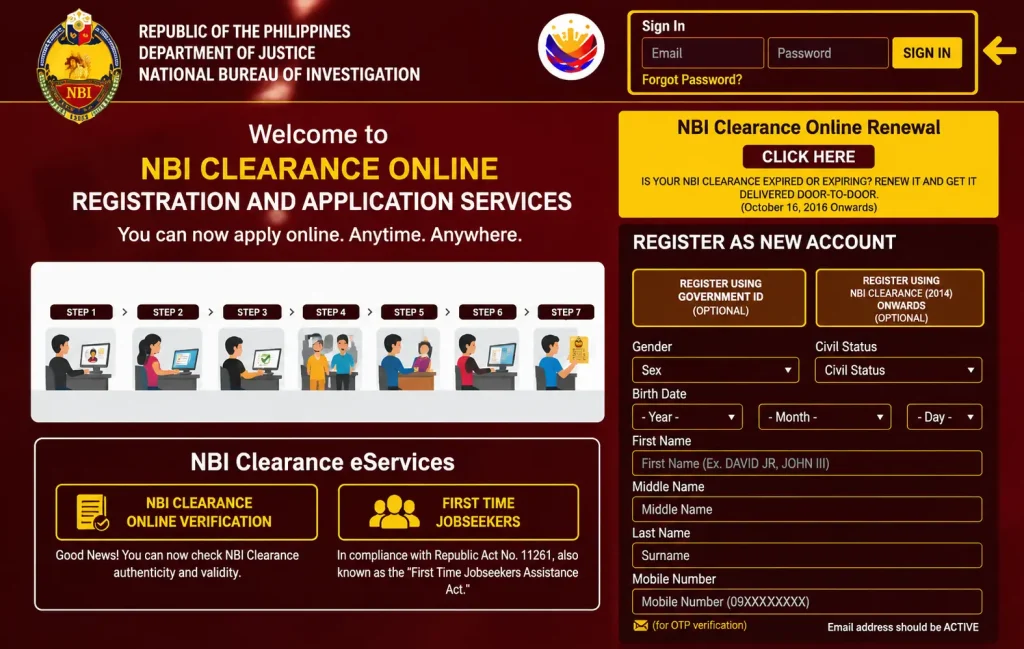
Step 1: Open the Official NBI Clearance Portal
Type clearance.nbi.gov.ph directly into your browser, or use the link on NBI’s how-to-apply page. Avoid clicking a sponsored result just because it looks official.
Step 2: Find the Sign In Section
The portal separates returning users from new users. Choose the sign-in area, not the registration one. Registering again with an email that already has an account is one of the most common ways people run into errors.
Step 3: Enter Your Registered Email Address and Password
Your login is the email address you registered with, plus the password you created. It isn’t your name or your reference number. Type slowly, check that Caps Lock is off, and watch for a browser that autofills an old password.
Step 4: Click Sign In and Access Your Account
Click Sign In, and you’ll land inside your account. If this is a brand-new account, the portal takes you straight to your applicant information, which is explained below.
How to Register for an NBI Clearance Account
Registration creates the account that every later step depends on, so it’s worth doing carefully.
What You Need Before Registering
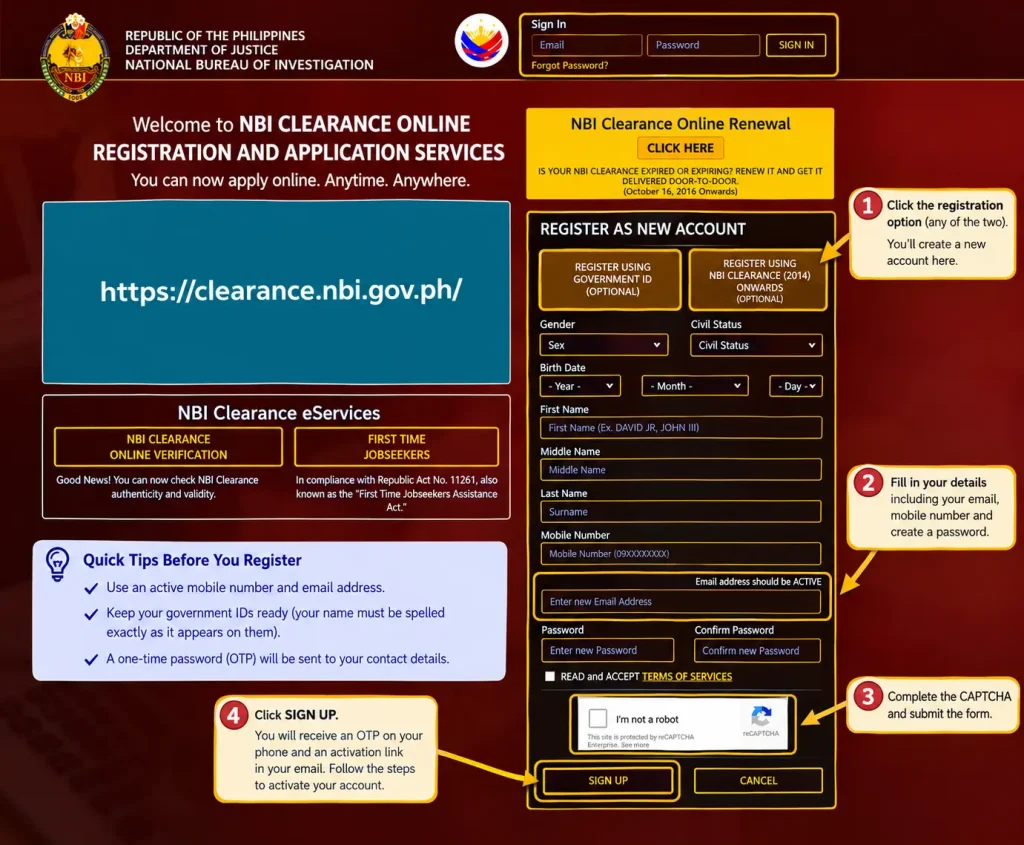
NBI asks for an active mobile number and an active email address, because you’ll enter a one-time password to verify your registration. Use contact details you can access right now and will keep for at least a year. Have your government IDs nearby too, since your name must be spelled exactly as it appears on them.
How to Create Your NBI Account
On the portal, choose the registration option and fill in your name, birth date, and contact details. Create a password, accept the Terms of Service, complete the CAPTCHA, and submit. A strong password matters here, because this account holds your personal record.
Email, Mobile Number, and OTP Verification
An OTP (one-time password) is a short code sent to your contact details to prove they belong to you. Enter the six-digit code in the box that appears after you submit the form. It stays valid for about five minutes, and you can request a new one after roughly 30 seconds. A new code replaces the old one, so always use the latest.
Next, NBI sends an activation email with a link. Click it to finish setting up your account. If you can’t see it, check your spam or junk folder. Until you activate, the account stays incomplete, which is why a correct password can still fail.
What to Do After Your Registration Is Complete
Sign in with your new email and password. Your account is ready, and the first job waiting for you inside is your applicant profile, which comes next.
What Can You Do After NBI Login?
Your account is the start of a chain: applicant information, application, appointment, payment, reference number, branch visit. Each step feeds the next.
Complete or Review Your Applicant Information
Fill out the Applicant Information Form with your personal details, family background, and education and employment information. Every mandatory field must be completed, and the spelling must match your valid IDs. Click Save Information, then review your profile page. This profile gets attached to every application you make, so a spelling error here follows you all the way to the counter.
Start an NBI Clearance Application
Click Apply for Clearance. A pop-up asks you to select the valid government ID you plan to bring to the branch. Choose one you will actually have with you on appointment day, because staff matches your ID to your profile.
Manage Your Clearance Transaction
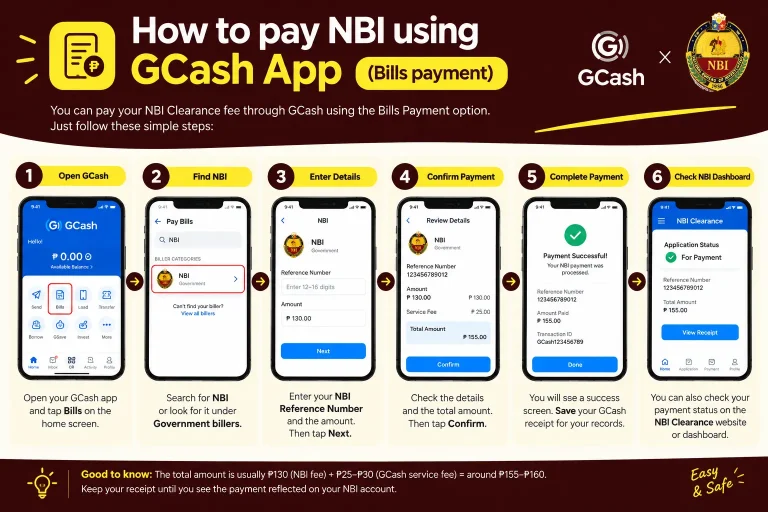
From your account, you choose a branch, a date, and an AM or PM slot. Then you pick a payment method: GCash, Maya, 7-Eleven, Bayad Center, or online banking. At that point, the system generates your reference number. You can also change or cancel an appointment from your account. Once your transaction shows PAID, NBI allows a 15-day grace period if you miss your date, so you can typically still visit your chosen branch within that window.
Find Important Transaction Information
Your dashboard and transaction page show your reference number, your application status, and your issue date once a clearance exists. The reference number is what you use to pay and what you show at the branch as your gate pass, so keep a screenshot or printout. The portal doesn’t display an expiry date. You add 12 months to the issue date yourself.
Can You Renew NBI Clearance Without Logging In?
Often, yes. NBI’s how-to-apply page says that if your clearance was issued after 2014 and none of your personal details have changed, you can skip the branch entirely. You choose the NBI Clearance Online Renewal option on the portal’s home page, and the renewed clearance is delivered by courier.
NBI Online Renewal Option
You enter the ID number from your previous clearance, and the system checks whether you’re eligible. If you are, you skip biometrics, enter your delivery details, and pay online. If you aren’t, it asks you to book a renewal appointment instead. The eGovPH Super App’s NBI eClearance service, launched in July 2026, is a separate renewal option. It uses your verified eGovPH account, not your NBI portal login.
Who Can Use the Quick Renewal Route?
You qualify if your previous clearance was issued after 2014, your name, birth date, and place of birth haven’t changed, and you still have your old clearance ID number. Without that number, quick renewal generally isn’t possible.
When You May Need the Regular NBI Clearance Portal Instead
Sign in to your regular account and book an appointment if your personal details changed, if you no longer have your old clearance number, or if the system asks for biometrics.
NBI Login vs NBI Registration vs NBI Clearance Application
| Action | What It Means | When You Use It |
| NBI Login | Access your existing NBI account | You already have an account |
| NBI Registration | Create a new NBI account | You are a new portal user |
| NBI Clearance Application | Start or continue your NBI Clearance application | You need to apply for an NBI Clearance |
| Quick Renewal | Renew your NBI Clearance through the designated renewal process | You meet the renewal requirements |
Most “login problems” start when someone uses the wrong action. That means registering again when they should sign in, or signing in to the regular portal when they belong on the first-time jobseekers portal.
NBI Login Problems and How to Fix Them
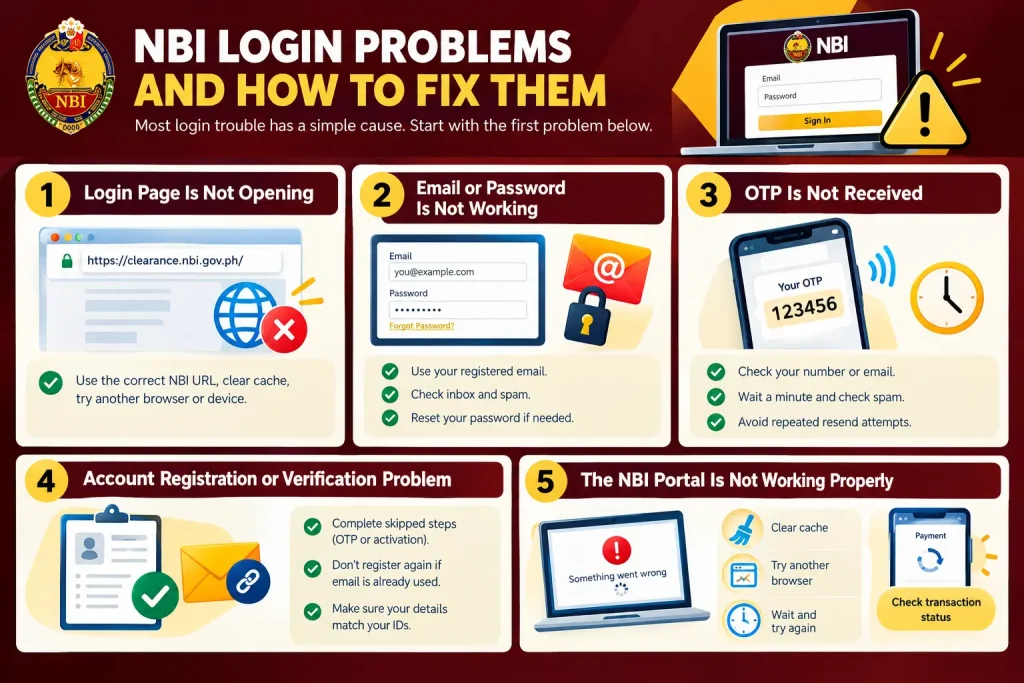
Most login trouble has a simple cause. Start with the first problem below, because it’s the quickest to check.
NBI Login Page Is Not Opening
If you typed the address by hand, retype it slowly. If a different page loads, close it and start again from NBI’s how-to-apply page. If the right page still won’t open, try another browser or device and clear your browser cache. Slow loading often means heavy traffic, so trying again at a quieter hour can help.
Email Address or Password Is Not Working
Work through these in order:
If you can no longer access your registered email, contact NBI through the details on its official website first. If you end up registering a new account, keep every personal detail identical to your first one.
OTP Is Not Received
Check that you typed your mobile number or email correctly, wait a minute, and look in spam. A weak signal can also delay an SMS. Don’t press Resend over and over, because too many requests can temporarily block new codes. If nothing arrives, try again later or on a different network.
Account Registration or Verification Problem
A registration that never fully finished is behind many “can’t sign in” cases. Finish whichever step was skipped, either the OTP or the activation link. If the portal says your email is already registered, don’t sign up again. Sign in or reset your password. Also check that the details in your profile match your IDs, because mismatches cause bigger problems at the branch than they do online.
The NBI Portal Is Not Working Properly
Blank pages, error messages, and endless loading usually point to maintenance or heavy use. Clear your cache, switch browsers, or wait and try again. If a page freezes while you’re paying, check your transaction status in your account before you pay a second time.
FAQS
Conclusion
After logging in to the NBI Portal, what you do next depends on your situation. If you are new to the NBI portal, start by registering your account, verifying the OTP, activating your email, and completing your applicant information. If you already have an account, simply sign in with your registered email and password, then proceed to Apply for Clearance. First-time jobseekers should use the dedicated First-Time Job Seekers portal from the start, while applicants renewing an existing clearance should first check whether the Online Renewal option applies to them before making a new appointment. Once you reach the official NBI website, consider bookmarking the address so you can return to the correct portal easily next time.